Edit a Project
To Edit a BIMoQ Project:
- First make sure you have Loaded a project.
- Navigate to the BIMoQ tab.
- In the Project section, click Edit.
- My Project window will open. You can now edit the project.
My Project Widnow
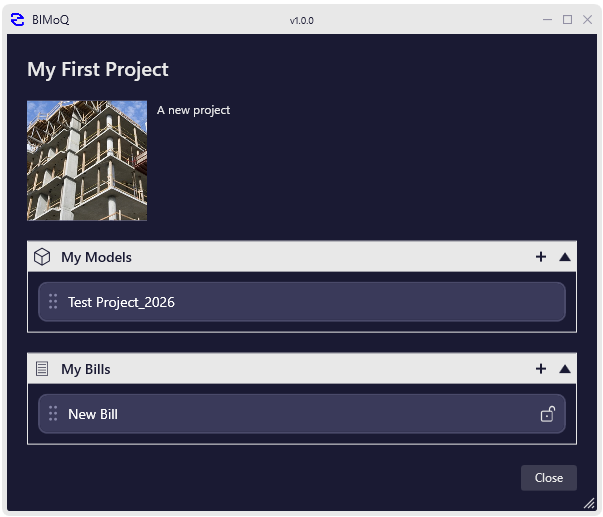
- Title: Hover over over the project name, click on the blue edit button and modify the name text.
- Description: Hover over the description, click on the blue edit button and modify the description text.
- Image: Hover over the image, click on the blue edit button and choose another image.
- My Models: From here we can add, remove, rename, or reload-from Revit models.
- Add: Click on the '+' button next to
My Modelsand choose a new model to add to the project. - Remove: Right click on a model. 'Remove' removes the model from the project.
- Rename: Right click on a model. 'Rename' allows to set a nickname for the model. The ful file name is always visible on the top of the context menu.
- Reload from: Right click on a model. If the model has been moved to another folder, you can use 'Reload from' to re-link to the BIMoQ project.
- Add: Click on the '+' button next to
- My Bills: From here we can add, configure, rename, or remove a bill.
- Add: Click on the '+' button next to
My Billsand follow these instructions to add a new bill to the project. - Configure: Right click on a bill. 'Configure' open the Configure Bill window.
- Rename: Right click on a bill. Click on 'Rename' to modify the bill's name.
- Remove: Right click on a bill. Click on 'Remove' to remove the bill from the project.
- Add: Click on the '+' button next to